FNA Process: Export the attribute table
Exporting the attribute table to .csv format
Exporting your attribute table to CSV (comma separated value) format makes your data versatile and accessible in various programs, such as Microsoft Excel, R, ArcGIS Pro, and QGIS. Follow these steps to export your table in ArcGIS Pro.
Step-by-step process
**Screenshots of the process are included below the written instructions for those who find them useful.*
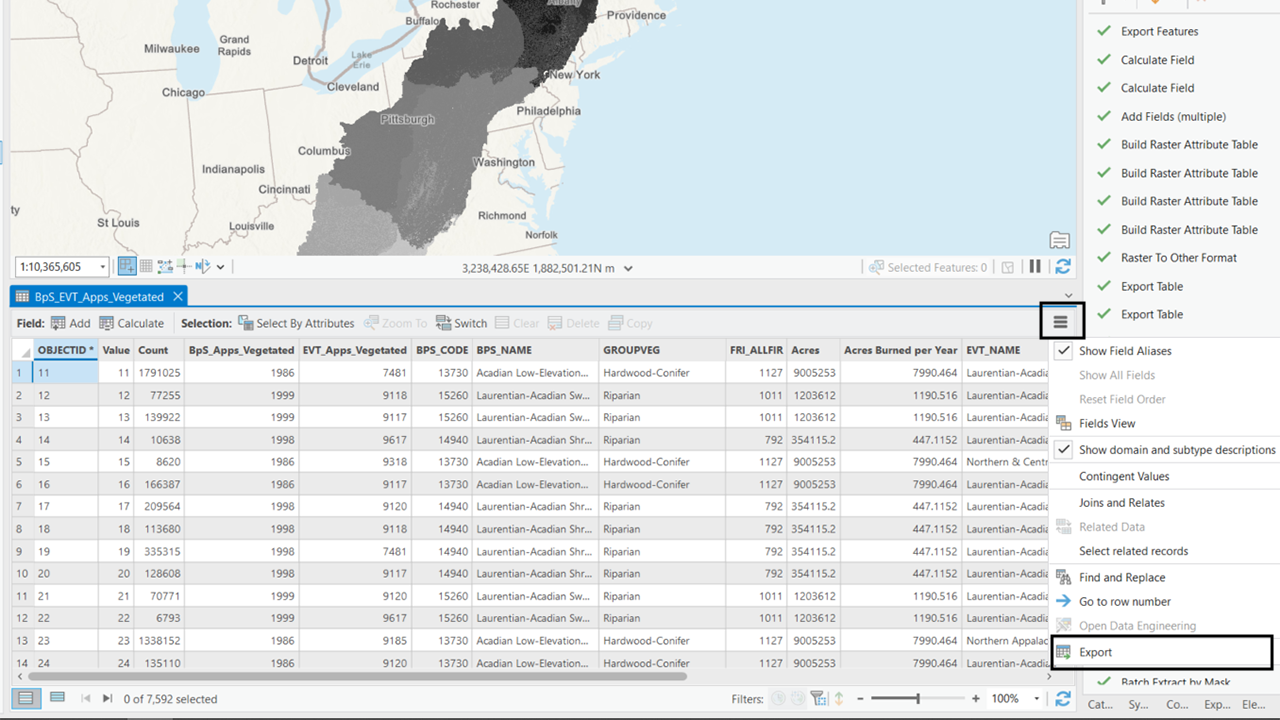
- Open the Attribute Table
- Open the attribute table for the combined raster you just used to join fields.
- Access the Export Option
Click the hamburger (three lines) menu in the top right corner of the attribute table window.
Select the “Export” option from the menu.
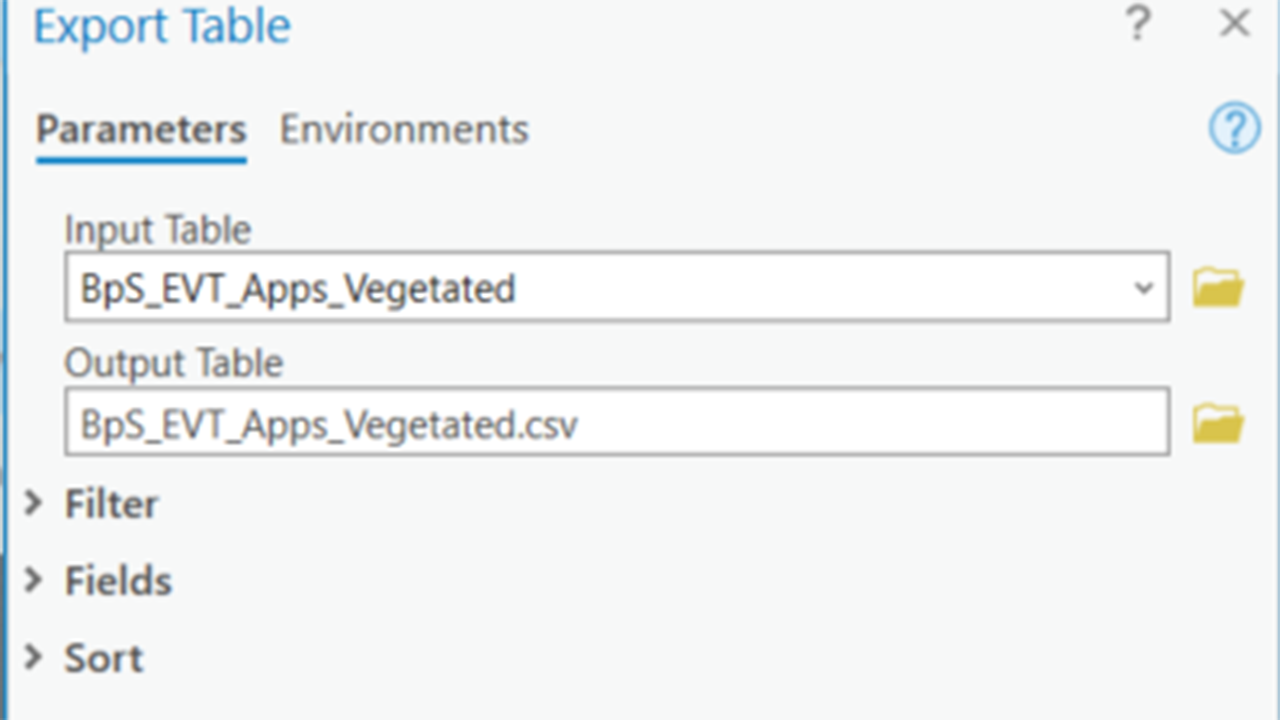
- Set Input Table
- In the Export Table dialogue window, ensure the input table is set to the combined table you just used to join fields.
- Set Output Table
Use the folder icon to choose a meaningful location to save your output table.
Important: Make sure you set the file extension to .csv. If you don’t do this, ArcGIS Pro will default to a .dbf format, which can be read by GIS but is harder to open with spreadsheet programs such as Excel.
- Complete the Export
- Confirm your settings and click Export to save the attribute table as a CSV file.
This process ensures your data is saved in a versatile format, making it easy to use in various applications for further analysis and visualization.
Screenshots of exporting the attribute table to .csv
Still have questions? LANDFIRE is here to help.
Ask the LANDFIRE Helpdesk (email link).
Search and subscribe to the LANDFIRE YouTube Channel (see tutorials, Office Hours, quick demonstrations).
Join an Office Hour (monthly meeting with open format Q & A with LANDFIRE experts).
Schedule a meeting (email link) with TNC’s LANDFIRE Team.