FNA Process: Combine rasters and join fields
Combining EVT and BPS rasters
To understand how Biophysical Settings (BPS), Existing Vegetation Type (EVT), and historical fire return intervals work together on the landscape, you need to combine the new EVT and BPS rasters. This process requires a Spatial Analyst license in ArcGIS Pro.
Step-by-step process
Screenshots of the process are included below the written instructions for those who find them useful.
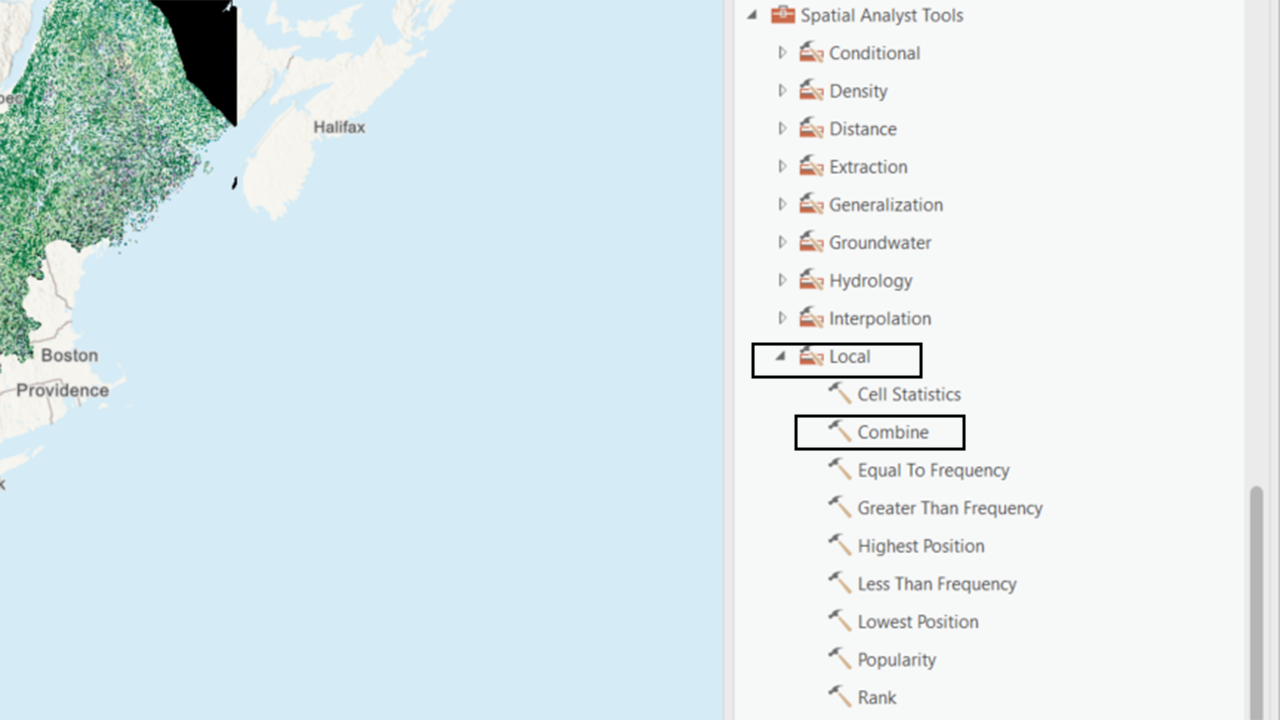
Navigate to the Spatial Analyst toolbox in ArcGIS Pro.
Within the Spatial Analyst toolbox, select the Local toolbox.
Open the Combine tool within the Local toolbox.
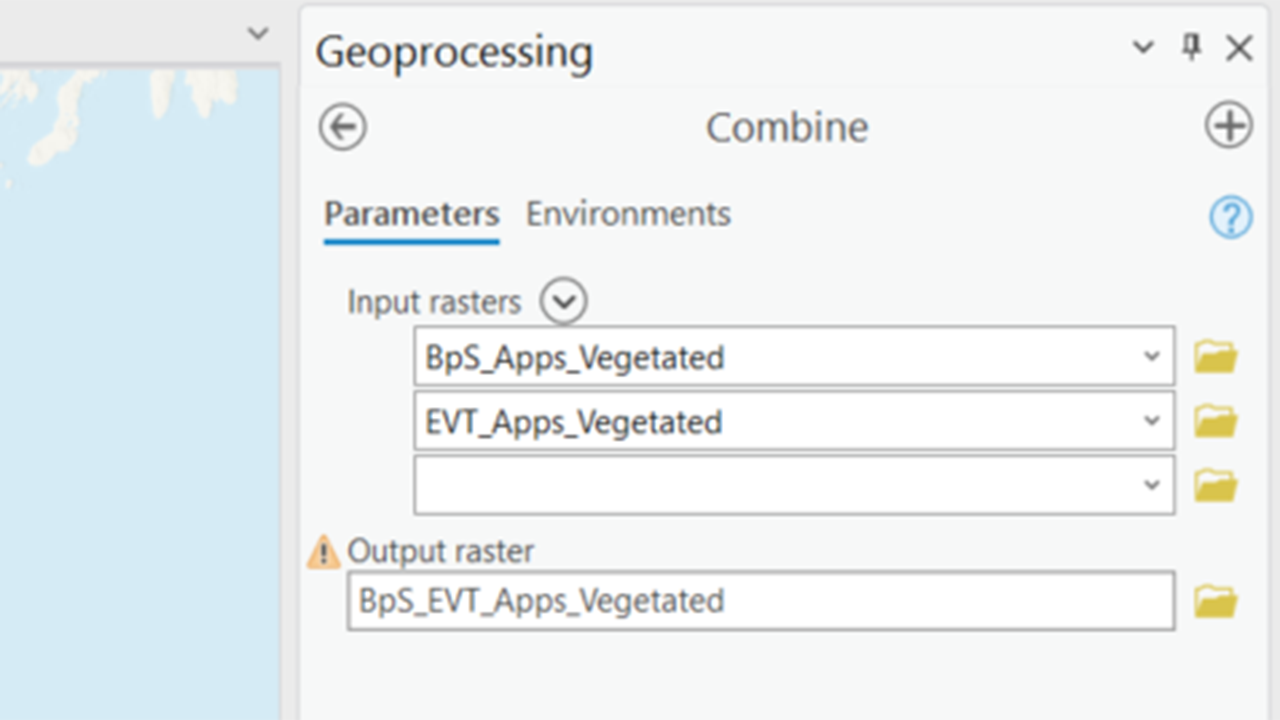
Within the Combine tool:
Input Rasters: Select the new BPS and EVT rasters you created in the last step as input rasters.
Output Raster: Set the output raster to something meaningful, such as “Combined_BPS_EVT”.
Check Environment Settings
Coordinate System: Ensure that you are using the correct coordinate system.
Masks: Make sure any masks are in place if needed.
Snap Raster: Choose the correct Snap Raster (e.g., the CONUS BPS Raster) to ensure alignment.
Run the Tool
- Execute the Combine tool to generate the combined raster.
This process will help you join fields and start understanding how BPS, EVT, and historic fire return intervals interact on the landscape, providing a comprehensive view for your fire needs assessment.
Screenshots for combining the BPS and EVT rasters
Adding attributes to the combined raster
After running the combine tool, you will get a raster attribute table with a few columns, such as Object ID, Value, Count, and the value fields from the BpS and EVT rasters. To make this data useful for analysis, you need to add the relevant attributes. This involves using the Join Field tool twice: once to join the BpS and Fire Return Interval values, and once to join the EVT values
Joining the BPS and fire regime fields
Screenshots of the process are included below the written instructions for those who find them useful.
- Navigate to the Join Field Tool
- Go to the Data Management toolbox in ArcGIS Pro.
- Navigate to Joins and Relates -> Join Fields.
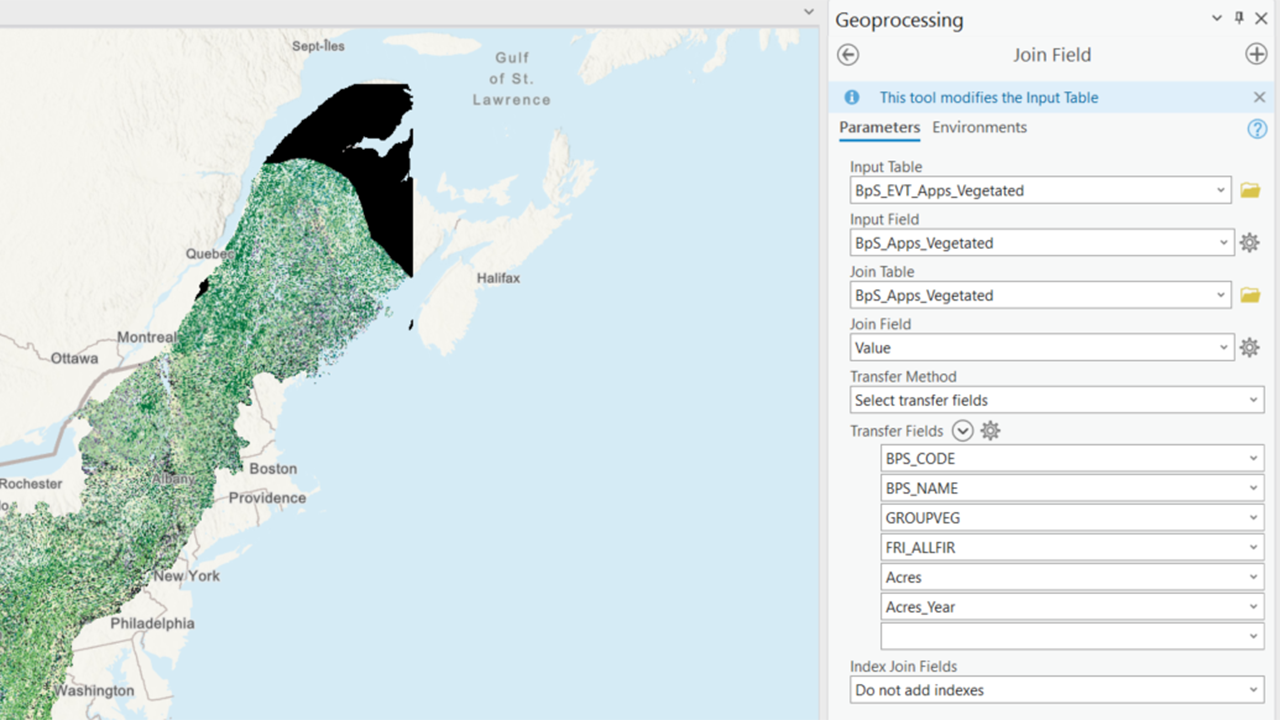
- Set Input Table
- For the input table, choose the output of your combine tool.
- Select Input Field
- For the Input field, first choose the BPS value field. This will allow you to add the BPS name and fire regime information first.
- Select Join Table
- For the Join Table, select your new BPS raster (the same one you used for the combine).
- Select Join Field
- For the Join Field, select the value field. This is the field in the BPS raster that will be common between the combine and the BPS raster.
- Transfer Fields
- Transfer the following fields, either by selecting transfer fields or using field mapping (you can change this with the drop-down arrow):
BPS_CODE
BPS_NAME
GROUPVEG
FRI_ALLFIR
The new acre fields you created earlier:
- Acres
- Acres_Year
- Transfer the following fields, either by selecting transfer fields or using field mapping (you can change this with the drop-down arrow):
You can add other fire regime fields if you want, including information on Fire Regime Group and Fire Severity, but Fire Return Interval is the one we will use during this tutorial.
Screenshots for joining the BPS and fire regime fields
Adding EVT Values
Screenshots of the process are included below the written instructions for those who find them useful. To add EVT fields, the process is the same, but you will need to change a few settings.
To re-run a tool in ArcGIS Pro with the same settings and parameters, you can use the history pane, which will show you all the tools you have run in this project in the past. The History Pane should also open when you open the Geoprocessing pane and run any Geoprocessing tool. You can use this to open the Join Field tool you just ran and change a few settings, rather than starting the tool from scratch.
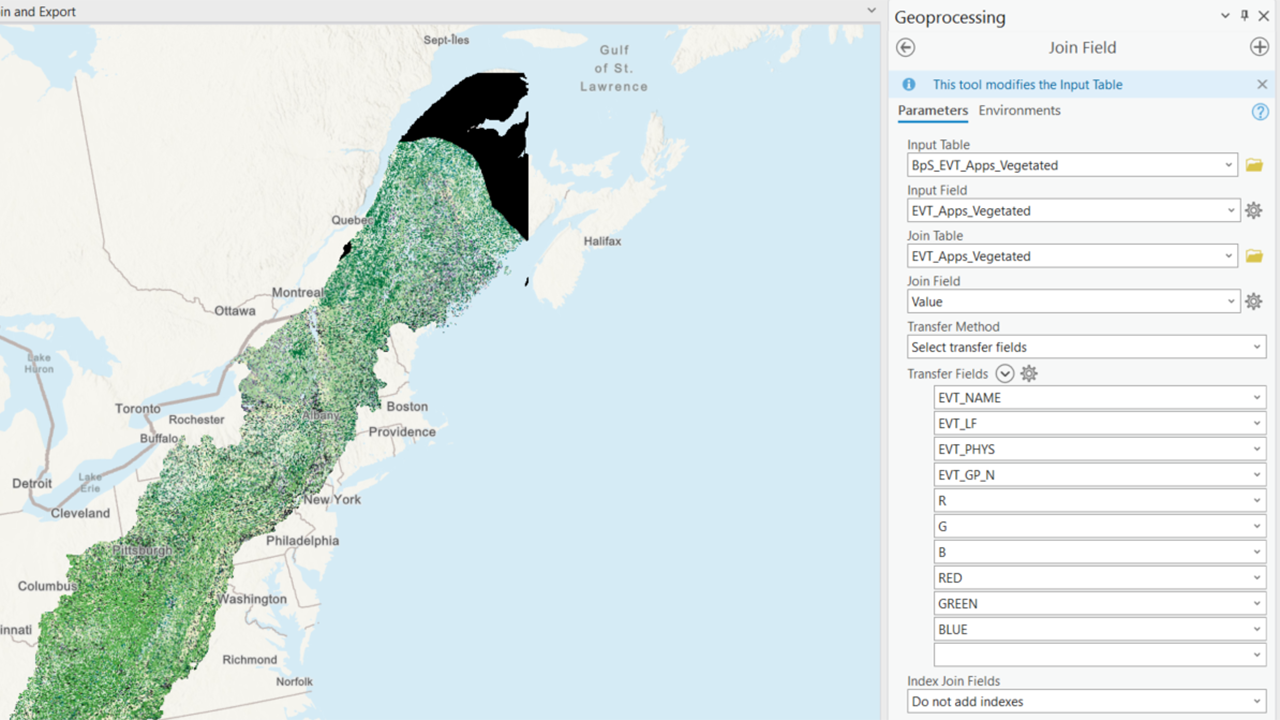
- Input Field
Leave the Input Table and the Join Field the same (assuming you did not change the name of the Value field in either your EVT or BPS raster).
Change the Input Field to the field in the combine that contains the values of your EVT raster.
- Join Table
- Select your EVT raster used in the combine.
- Transfer Fields
- Transfer the following fields:
EVT_NAME
EVT_LF
EVT_GP_N
Optional: You can add the R, G, B, and RED, GREEN, BLUE fields to use the EVT colormap in any maps you make for the project.
- Transfer the following fields:
This process will enrich your combined raster with the necessary attributes, allowing you to analyze how BPS, EVT, and historic fire return intervals interact on the landscape.
Screenshots for joining the BPS and fire regime fields
Still have questions? LANDFIRE is here to help.
Ask the LANDFIRE Helpdesk (email link).
Search and subscribe to the LANDFIRE YouTube Channel (see tutorials, Office Hours, quick demonstrations).
Join an Office Hour (monthly meeting with open format Q & A with LANDFIRE experts).
Schedule a meeting (email link) with TNC’s LANDFIRE Team.